How to Edit Skin Retouching in Photoshop
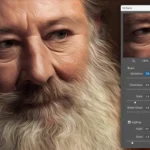
Editing high-end skin retouching in Photoshop involves refining and enhancing the skin while maintaining a natural and professional appearance. Here’s a step-by-step guide for high-end skin retouching:
1. Open Your Image:
- Open the image you want to retouch in Photoshop.
2. Duplicate the Background Layer:
- Right-click on the background layer in the Layers panel and choose “Duplicate Layer.” This provides a non-destructive copy for editing.
3. Remove Minor Blemishes with Spot Healing Brush:
- Select the Spot Healing Brush Tool (J) and use it to remove minor blemishes, spots, or imperfections on the skin. This tool is effective for quick, automatic corrections.
4. Use Healing Brush for Larger Areas:
- For larger areas or more complex blemishes, use the Healing Brush Tool (J). Alt-click to sample a clean area, then paint over the imperfections.
5. Add a New Layer for Frequency Separation:
- Create a new layer by clicking on the “New Layer” icon. This layer will be used for frequency separation.
6. Apply Frequency Separation:
- Apply frequency separation by going to
Filter > Blur > Gaussian Blur. Adjust the radius until skin texture is blurred, leaving colors and tones intact.
7. Create a High-Frequency Layer:
- Duplicate the original layer, place it above the blurred layer, and set the blend mode to “Linear Light.” This layer contains the high-frequency details.
8. Use the Healing Brush on the Low-Frequency Layer:
- Select the low-frequency layer and use the Healing Brush Tool to address color and tone issues. This layer deals with overall skin tones.
9. Use the Clone Stamp Tool for Texture:
- Switch to the high-frequency layer and use the Clone Stamp Tool (S) to sample and paint over skin texture irregularities. This layer focuses on fine details.
10. Adjust Opacity for Natural Look:
cssCopy code
- Adjust the opacity of both frequency separation layers to find the right balance between smoothness and texture. Aim for a natural appearance.
11. Dodge and Burn for Contouring:
vbnetCopy code
- Create a new layer and set it to "Soft Light" blend mode. Use the Dodge (lighten) and Burn (darken) tools to contour and enhance facial features.
12. Use Curves Adjustment Layers:
vbnetCopy code
- Add Curves adjustment layers to fine-tune overall brightness and contrast. Adjust the curves for the highlights, midtones, and shadows.
13. Brighten Eyes and Teeth:
cssCopy code
- Create a new layer and use the Dodge Tool to brighten the whites of the eyes and teeth. Be subtle to avoid an unnatural look.
14. Reduce Wrinkles (Optional):
rustCopy code
- If necessary, use the Healing Brush or Clone Stamp Tool to reduce the appearance of wrinkles while maintaining a natural look.
15. Final Adjustments:
cssCopy code
- Make any final adjustments using additional adjustment layers, such as Color Balance, Hue/Saturation, or Selective Color, to achieve the desired color grading.
16. Check in High Zoom:
cssCopy code
- Zoom in at a high magnification to ensure that the skin retains a natural texture without artifacts or excessive smoothing.
17. Save and Export:
arduinoCopy code
- Once satisfied, save your work and export the image in your preferred format.
Tips:
- Keep It Natural:
- Avoid over-smoothing or creating an unrealistic look. Maintain natural skin texture for a high-end retouch.
- Use Layers for Non-Destructive Editing:
- Utilize layers and adjustment layers for non-destructive editing. This allows you to go back and make changes later.
- Practice Subtlety:
- Subtle adjustments often yield the best results. Aim for a polished appearance without removing all character from the skin.
High-end skin retouching requires a balance between addressing imperfections and preserving the natural beauty of the subject. Practice, experimentation, and attention to detail are key elements in achieving professional and realistic results.


