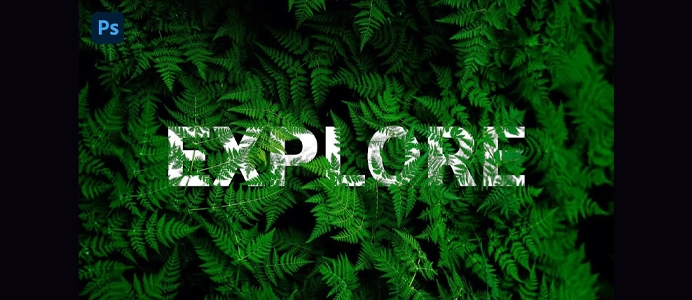
How to Create a Typography using Masking Effect
How to create a Typography using Masking Effect:
How to create a Typography using Masking Effect:
Creating a typography poster design with a masking effect in Photoshop involves combining text elements with images, textures, or gradients using layer masks. Here’s a step-by-step guide to help you achieve this:
1: Set Up Your Document
- Open Photoshop:
- Launch Adobe Photoshop and create a new document with the desired dimensions for your poster (e.g., 11×17 inches).
2: Choose Background
- Add a Background:
- Choose a background for your poster. This could be a solid color, a gradient, an image, or a textured layer.
3: Add Text Elements
- Create Text Layers:
- Use the Text Tool (T) to create your typography. Add your desired text elements, choosing fonts, sizes, and colors that suit your design.
- Adjust Text Arrangement:
- Experiment with the arrangement of your text elements. You can use multiple text layers to create hierarchy and emphasis.
4: Introduce Masking
- Duplicate the Background:
- Duplicate your background layer (Ctrl/Cmd + J) to create a copy.
- Clip the Background Copy to Text:
- Move the duplicated background layer above the text layers in the Layers panel. Right-click on the duplicated background layer and choose “Create Clipping Mask” or press Ctrl/Cmd + Alt + G. This makes the duplicated background layer only visible within the text.
5: Apply Texture or Image
- Add a Texture or Image:
- Place a texture or image above the duplicated background layer. This can be a photo, a pattern, or any element you want to use within the text.
- Create Clipping Mask:
- Right-click on the texture/image layer and choose “Create Clipping Mask” or press Ctrl/Cmd + Alt + G. This confines the texture or image to the shape of the text.
6: Refine and Experiment
- Adjust Opacity:
- Adjust the opacity of the texture/image layer to control the blending effect. This creates a subtle integration of the image within the text.
- Experiment with Blending Modes:
- Change the blending mode of the texture/image layer to experiment with different effects. Modes like “Overlay” or “Multiply” often work well for blending textures.
7: Add Additional Elements
- Enhance with Additional Elements:
- Consider adding more design elements, such as shapes, icons, or additional text, to enhance the overall composition.
8: Fine-Tune and Finalize
- Fine-Tune the Design:
- Fine-tune the design by adjusting the colors, contrasts, and any other visual elements to achieve the desired look.
- Group Layers (Optional):
- Group related layers together in the Layers panel to keep your project organized.
9: Save and Export
- Save and Export:
- Once satisfied with the design, save your project file (.PSD) and export the final poster in your preferred format.
Tips:
- Experiment with Masks:
- Use layer masks on text layers to create intricate shapes or patterns within the text.
- Use High-Contrast Textures:
- High-contrast textures or images can create a striking visual impact within the text.
- Play with Typography Styles:
- Experiment with different font styles, sizes, and arrangements to create dynamic and engaging typography.
This process allows you to create a visually appealing typography poster with a masking effect, blending text with images or textures for a unique and artistic result.
How to create a Typography using Masking Effect
Mixtapepsds Photoshop tutorials
Video Source


Related Post

Jan 27, 2024
How to Make a Mixtape Cover
Published by Jules Mercado How to Edit a Mixtape Cover using..
Comments Off on How to Make a Mixtape Cover

Jan 12, 2024
Inverse Curve Technique for Painting Light In Photoshop Video
Written by: Jules Mercado (Mixtapepsds) The inverse curve te..
Comments Off on Inverse Curve Technique for Painting Light In Photoshop Video

Jan 12, 2024
3 Ways to Add Depth to Your Composite in Photoshop Video
3 Ways to Add Depth to Your Composite in Photoshop Depth to ..
Comments Off on 3 Ways to Add Depth to Your Composite in Photoshop Video

Jan 12, 2024
Advanced Hair Masking with Channels in Photoshop Video
Advanced Hair Masking with Channels in Photoshop Video. Crea..
Comments Off on Advanced Hair Masking with Channels in Photoshop Video

Jan 10, 2024
Master Brush Tool from Start to Finish in Photoshop Video
Master Brush Tool from Start to Finish in Photoshop Video Ma..
Comments Off on Master Brush Tool from Start to Finish in Photoshop Video

Jan 10, 2024
How to Blend Images and Composites with Photoshop Video
10-Step GUIDE: How to Blend Images and Composites with Photo..
Comments Off on How to Blend Images and Composites with Photoshop Video

Jan 08, 2024
How To Cut Anything Out in Photoshop Video
How To Cut Anything Out in Photoshop Welcome to our comprehe..
Comments Off on How To Cut Anything Out in Photoshop Video

Jan 08, 2024
How to use the Toolbar in Photoshop Tutorial Video
How to use the Toolbar in Photoshop Tutorial Using the Toolb..
Comments Off on How to use the Toolbar in Photoshop Tutorial Video

Jan 08, 2024
13 Photo Manipulation Tips in Photoshop Video
13 Photo Manipulation Tips in Photoshop: 1. Understand Basic..
Comments Off on 13 Photo Manipulation Tips in Photoshop Video
Jan 08, 2024
How to use Different Blending Options in Photoshop
How to use Different Blending Options in Photoshop..
Comments Off on How to use Different Blending Options in Photoshop