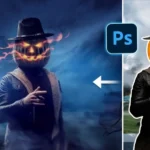
Create Composites and Blend Images with Photoshop
Create Composites and Blend Images with Photoshop
Blending images and creating composites in Photoshop involves combining multiple images seamlessly to create a cohesive and visually appealing result. Here’s a step-by-step guide:
1: Open Your Images
- Open the images you want to blend in Photoshop.
2: Arrange Layers
- Arrange the images by dragging and dropping them into a single document. Each image will be on a separate layer.
3: Choose a Base Image
- Select one image as the base or background layer. This is usually the image that forms the primary setting or background of your composite.
4: Add Layer Masks
- Add layer masks to the layers you want to blend. Layer masks allow you to hide or reveal parts of a layer, creating smooth transitions between images.
- Click on the layer you want to add a mask to.
- Click the “Add Layer Mask” icon at the bottom of the Layers panel.
5: Use Selections and Masks
- Use selections and masks to control which parts of each layer are visible. You can use tools like the Pen Tool, Lasso Tool, or Quick Selection Tool to make precise selections.
- Create a selection around the area you want to keep visible.
- Click on the layer mask icon to create a mask based on the selection.
6: Adjust Layer Opacity
- Adjust the opacity of individual layers to control their transparency and blend them more naturally. Lower opacity allows the layers to partially show through.
7: Match Colors and Lighting
- Ensure that the colors and lighting of the different layers match for a more realistic blend. Use adjustment layers, such as Color Balance or Levels, to match the color tones.
- Create adjustment layers above the layers you want to adjust.
- Clip the adjustment layers to the specific layers by holding Alt and clicking between them.
8: Add Shadows and Highlights
- Create realistic shadows and highlights to enhance the composite’s realism.
- Create a new layer and set its blend mode to “Multiply” for shadows or “Screen” for highlights.
- Use a soft brush to paint shadows or highlights where needed.
9: Use the Clone Stamp Tool
- Use the Clone Stamp Tool to remove unwanted elements or imperfections and to blend areas seamlessly.
- Select the Clone Stamp Tool (S).
- Hold Alt and click on a source point.
- Paint over the area you want to replace or blend.
10: Apply Filters and Effects
- Apply filters or effects to unify the entire composition. This can include adding a consistent texture, applying a blur, or adjusting overall contrast.
11: Final Adjustments
- Make final adjustments to color, contrast, and sharpness. Use adjustment layers and filters to refine the overall look.
12: Flatten or Keep Layers
- Once satisfied with the composite, you can either flatten the image (Merge Visible or Flatten Image) or keep the layers for further editing.
Tips:
- Pay Attention to Perspective:
- Ensure that the perspective of each element matches to create a realistic composition.
- Use Layer Styles:
- Experiment with layer styles like drop shadows or inner glows to add depth.
- Experiment with Blending Modes:
- Try different blending modes for layers to achieve interesting effects.
- Practice Masking Techniques:
- Mastering masking techniques is crucial for seamless blending.
Creating composites in Photoshop requires a combination of masking, blending, and color adjustments. Practice and experimentation are key to achieving the desired results.
Create Composites and Blend Images with Photoshop
Mixtapepsds Photoshop Tutorials
Video Source

Related Post

Jan 27, 2024
How to Make a Mixtape Cover
Published by Jules Mercado How to Edit a Mixtape Cover using..
Comments Off on How to Make a Mixtape Cover

Jan 12, 2024
Inverse Curve Technique for Painting Light In Photoshop Video
Written by: Jules Mercado (Mixtapepsds) The inverse curve te..
Comments Off on Inverse Curve Technique for Painting Light In Photoshop Video

Jan 12, 2024
3 Ways to Add Depth to Your Composite in Photoshop Video
3 Ways to Add Depth to Your Composite in Photoshop Depth to ..
Comments Off on 3 Ways to Add Depth to Your Composite in Photoshop Video

Jan 12, 2024
Advanced Hair Masking with Channels in Photoshop Video
Advanced Hair Masking with Channels in Photoshop Video. Crea..
Comments Off on Advanced Hair Masking with Channels in Photoshop Video

Jan 10, 2024
Master Brush Tool from Start to Finish in Photoshop Video
Master Brush Tool from Start to Finish in Photoshop Video Ma..
Comments Off on Master Brush Tool from Start to Finish in Photoshop Video

Jan 10, 2024
How to Blend Images and Composites with Photoshop Video
10-Step GUIDE: How to Blend Images and Composites with Photo..
Comments Off on How to Blend Images and Composites with Photoshop Video

Jan 08, 2024
How To Cut Anything Out in Photoshop Video
How To Cut Anything Out in Photoshop Welcome to our comprehe..
Comments Off on How To Cut Anything Out in Photoshop Video

Jan 08, 2024
How to use the Toolbar in Photoshop Tutorial Video
How to use the Toolbar in Photoshop Tutorial Using the Toolb..
Comments Off on How to use the Toolbar in Photoshop Tutorial Video

Jan 08, 2024
13 Photo Manipulation Tips in Photoshop Video
13 Photo Manipulation Tips in Photoshop: 1. Understand Basic..
Comments Off on 13 Photo Manipulation Tips in Photoshop Video

Jan 08, 2024
How to Create a Typography using Masking Effect
How to create a Typography using Masking Effect: How to crea..
Comments Off on How to Create a Typography using Masking Effect