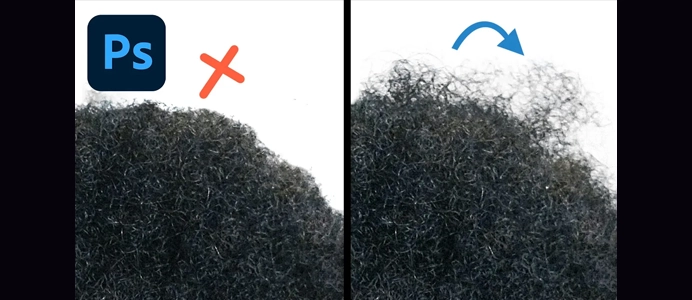
How to Create a Transparent Effect in Photoshop
How to Create a Transparent Effect in Photoshop. Creating a transparent effect in Photoshop involves making part of an image or object partially see-through. Here’s a step-by-step guide:
1: Adding Layer Opacity
- Open Your Image:
- Open the image you want to work on in Photoshop.
- Duplicate the Layer:
- Duplicate the layer by right-clicking on the background layer in the Layers panel and choosing “Duplicate Layer.”
- Create a Selection:
- Use any selection tool (e.g., Marquee, Lasso, or Pen Tool) to select the area you want to make transparent.
- Add a Layer Mask:
- Click on the “Add Layer Mask” icon at the bottom of the Layers panel. This will create a layer mask based on your selection.
- Adjust Layer Opacity:
- With the layer mask selected, adjust the opacity of the layer to control the transparency. You can find the opacity slider in the Layers panel.
2: Using the Eraser Tool
- Open Your Image:
- Open the image in Photoshop.
- Duplicate the Layer:
- Duplicate the layer you want to make transparent.
- Select the Eraser Tool (E):
- Choose the Eraser Tool from the toolbar.
- Adjust Brush Settings:
- Adjust the brush size, hardness, and opacity in the Options Bar.
- Erase the Area:
- Use the Eraser Tool to erase the parts of the duplicated layer you want to make transparent.
- Adjust Layer Opacity:
- Adjust the overall opacity of the duplicated layer to control the transparency.
3: Using Layer Styles
- Open Your Image:
- Open the image in Photoshop.
- Duplicate the Layer:
- Duplicate the layer you want to make transparent.
- Double-Click on the Layer:
- Double-click on the duplicated layer to open the Layer Style dialog.
- Adjust the Fill Opacity:
- In the Layer Style dialog, find the “Fill” slider and adjust its opacity to control the transparency of the layer. Click “OK” when done.
4: Using Blending Modes
- Open Your Image:
- Open the image in Photoshop.
- Duplicate the Layer:
- Duplicate the layer you want to make transparent.
- Select a Blending Mode:
- Experiment with different blending modes in the Layers panel to achieve the desired transparent effect. Modes like “Screen,” “Overlay,” or “Multiply” can work well.
- Adjust Layer Opacity:
- Adjust the overall opacity of the layer to fine-tune the transparency level.
Tips:
- Layer Masks for Precision:
- Using layer masks provides more precision and allows you to adjust transparency without permanently erasing parts of the image.
- Experiment with Layer Styles:
- Layer Styles offer additional options for controlling transparency, such as Fill Opacity.
- Combine Methods:
- You can combine multiple methods for different parts of an image to achieve the desired transparency effect.
- Save as PNG:
- If you need to preserve transparency when exporting, save your image as a PNG file.
Choose the method that best fits your workflow and the specific requirements of your project. Adjustments to transparency can be made based on your creative vision and design goals.
ChatGPT can make mistakes. Consider checking important information.


