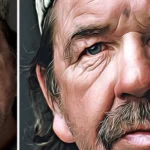
How to Turn a Photo to Cartoon Logo in Photoshop
Creating a cartoon effect in Photoshop involves using various filters and adjustments to simplify and stylize the image. Here’s a step-by-step guide:
1. Open Your Image:
- Launch Photoshop and open the image you want to turn into a cartoon.
2. Duplicate the Layer:
- Right-click on the background layer in the Layers panel and choose “Duplicate Layer.”
3. Apply the Posterize Filter:
- With the duplicated layer selected, go to
Image > Adjustments > Posterize. - Adjust the levels to simplify the color range. A lower number of levels will result in a more cartoon-like effect.
4. Apply the Cutout Filter:
- With the duplicated layer selected, go to
Filter > Artistic > Cutout. - Adjust the Number of Levels, Edge Simplicity, and Edge Fidelity to achieve a stylized, simplified appearance.
5. Convert to Smart Object:
- Right-click on the duplicated layer and choose “Convert to Smart Object.”
- This step allows you to apply additional filters as Smart Filters, making them non-destructive and editable.
6. Apply the Gaussian Blur:
- With the Smart Object layer selected, go to
Filter > Blur > Gaussian Blur. - Apply a slight blur to smooth out any harsh edges. Adjust the radius to your preference.
7. Add Adjustment Layers:
- Create adjustment layers (e.g., Levels, Curves, or Hue/Saturation) to enhance or modify the colors and contrast.
- Experiment with these adjustments to achieve the desired cartoonish look.
8. Create a New Layer for Outlines:
- Create a new layer on top of all layers.
- Use the Brush tool to draw black lines outlining prominent features, such as eyes, nose, and mouth. This step adds a comic book-style outline.
9. Adjust Opacity (Optional):
- Adjust the opacity of the outline layer to make the lines more subtle. Experiment to find the right balance.
10. Add Color Overlay (Optional):
- Create a new layer beneath the outline layer.
- Use the Brush tool to add flat colors to different areas of the image, mimicking a traditional cartoon style.
11. Fine-Tune Details:
- Zoom in and fine-tune details using the Brush tool, Eraser tool, and other tools as needed.
12. Save Your Image:
- Save your work in Photoshop format (
File > SaveorFile > Save As). - Export the image for sharing or printing (
File > Export > Export As).
Tips:
- Experiment with Filters: Try different combinations of filters and adjustments to achieve the cartoon effect you like.
- Color Choices: Play with color saturation and tones to create a vibrant and dynamic cartoon appearance.
- Brush Settings: Adjust the brush settings, such as size and hardness, for precise detailing.
- Combine Techniques: Combine various techniques, such as adding outlines and color overlays, to enhance the cartoon effect.
Remember that the cartoon effect can be highly stylized, and personal preferences play a significant role in achieving the desired look. Feel free to experiment with different settings and techniques to create a cartoon style that suits your vision.
How to Turn a Photo to Cartoon Logo in Photoshop
Mixtapepsds Photoshop Tutorials
Video Source

Related Post

Jan 27, 2024
How to Make a Mixtape Cover
Published by Jules Mercado How to Edit a Mixtape Cover using..
Comments Off on How to Make a Mixtape Cover

Jan 12, 2024
Inverse Curve Technique for Painting Light In Photoshop Video
Written by: Jules Mercado (Mixtapepsds) The inverse curve te..
Comments Off on Inverse Curve Technique for Painting Light In Photoshop Video

Jan 12, 2024
3 Ways to Add Depth to Your Composite in Photoshop Video
3 Ways to Add Depth to Your Composite in Photoshop Depth to ..
Comments Off on 3 Ways to Add Depth to Your Composite in Photoshop Video

Jan 12, 2024
Advanced Hair Masking with Channels in Photoshop Video
Advanced Hair Masking with Channels in Photoshop Video. Crea..
Comments Off on Advanced Hair Masking with Channels in Photoshop Video

Jan 10, 2024
Master Brush Tool from Start to Finish in Photoshop Video
Master Brush Tool from Start to Finish in Photoshop Video Ma..
Comments Off on Master Brush Tool from Start to Finish in Photoshop Video

Jan 10, 2024
How to Blend Images and Composites with Photoshop Video
10-Step GUIDE: How to Blend Images and Composites with Photo..
Comments Off on How to Blend Images and Composites with Photoshop Video

Jan 08, 2024
How To Cut Anything Out in Photoshop Video
How To Cut Anything Out in Photoshop Welcome to our comprehe..
Comments Off on How To Cut Anything Out in Photoshop Video

Jan 08, 2024
How to use the Toolbar in Photoshop Tutorial Video
How to use the Toolbar in Photoshop Tutorial Using the Toolb..
Comments Off on How to use the Toolbar in Photoshop Tutorial Video

Jan 08, 2024
13 Photo Manipulation Tips in Photoshop Video
13 Photo Manipulation Tips in Photoshop: 1. Understand Basic..
Comments Off on 13 Photo Manipulation Tips in Photoshop Video

Jan 08, 2024
How to Create a Typography using Masking Effect
How to create a Typography using Masking Effect: How to crea..
Comments Off on How to Create a Typography using Masking Effect