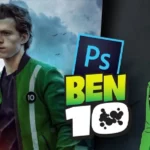
My Entry to Benny’s Spooky Edit War 2022
Turning an image into a cartoon in Photoshop involves simplifying details, enhancing edges, and adjusting colors to create a more illustrated, graphic look. Here’s a step-by-step guide on how to achieve this effect:
1. Open Image:
- Launch Photoshop and open the image you want to transform into a cartoon.
2. Duplicate the Layer:
- Right-click on the background layer in the Layers panel and select “Duplicate Layer.” This ensures you’re working on a copy of the original image.
3. Gaussian Blur:
- Apply a Gaussian Blur to the duplicated layer:
- Go to “Filter > Blur > Gaussian Blur.”
- Adjust the radius until you get a smooth, blended look. This blurs the image, reducing fine details.
4. Adjust Levels:
- Enhance the contrast by adjusting the Levels:
- Go to “Image > Adjustments > Levels.”
- Drag the black and white sliders towards the center to increase contrast.
5. Apply Posterize Filter:
- To simplify the color range and create a more graphic look:
- Go to “Image > Adjustments > Posterize.”
- Adjust the levels to control the number of colors in the image.
6. Convert to Smart Object:
- Right-click on the layer and choose “Convert to Smart Object.” This allows you to apply filters non-destructively.
7. Add a High Pass Filter:
- Go to “Filter > Other > High Pass.”
- Adjust the radius until you see the edges of the main features in the image.
8. Set Blend Mode:
- Change the blend mode of the High Pass layer to “Overlay” or “Soft Light.” This enhances the edges and details.
9. Adjust Saturation:
- To boost or modify colors:
- Go to “Image > Adjustments > Hue/Saturation.”
- Adjust the saturation to achieve the desired color intensity.
10. Curves Adjustment:
- Fine-tune the overall contrast using a Curves adjustment layer:
- Go to “Layer > New Adjustment Layer > Curves.”
- Adjust the curve for highlights and shadows.
11. Add Noise (Optional):
- To introduce a subtle texture similar to traditional cartoon styles:
- Go to “Filter > Noise > Add Noise.”
- Adjust the amount of noise and check “Monochromatic.”
12. Final Adjustments:
- Make any additional adjustments using various tools like Levels, Curves, or Color Balance to refine the cartoon effect.
13. Save and Export:
- Save your work, and when satisfied, export the image in your desired format.
14. Experiment and Fine-Tune:
- Cartoon effects can vary, so feel free to experiment with different settings and adjustments until you achieve the desired look.
By following these steps, you can transform a regular image into a cartoon-style illustration using Photoshop. Keep in mind that the effectiveness of this process may vary based on the content and quality of the original image.
My Entry to Benny’s Spooky Edit War 2022
Mixtapepsds Photoshop Tutorials
Video Source

Related Post

Jan 27, 2024
How to Make a Mixtape Cover
Published by Jules Mercado How to Edit a Mixtape Cover using..
Comments Off on How to Make a Mixtape Cover

Jan 12, 2024
Inverse Curve Technique for Painting Light In Photoshop Video
Written by: Jules Mercado (Mixtapepsds) The inverse curve te..
Comments Off on Inverse Curve Technique for Painting Light In Photoshop Video

Jan 12, 2024
3 Ways to Add Depth to Your Composite in Photoshop Video
3 Ways to Add Depth to Your Composite in Photoshop Depth to ..
Comments Off on 3 Ways to Add Depth to Your Composite in Photoshop Video

Jan 12, 2024
Advanced Hair Masking with Channels in Photoshop Video
Advanced Hair Masking with Channels in Photoshop Video. Crea..
Comments Off on Advanced Hair Masking with Channels in Photoshop Video

Jan 10, 2024
Master Brush Tool from Start to Finish in Photoshop Video
Master Brush Tool from Start to Finish in Photoshop Video Ma..
Comments Off on Master Brush Tool from Start to Finish in Photoshop Video

Jan 10, 2024
How to Blend Images and Composites with Photoshop Video
10-Step GUIDE: How to Blend Images and Composites with Photo..
Comments Off on How to Blend Images and Composites with Photoshop Video

Jan 08, 2024
How To Cut Anything Out in Photoshop Video
How To Cut Anything Out in Photoshop Welcome to our comprehe..
Comments Off on How To Cut Anything Out in Photoshop Video

Jan 08, 2024
How to use the Toolbar in Photoshop Tutorial Video
How to use the Toolbar in Photoshop Tutorial Using the Toolb..
Comments Off on How to use the Toolbar in Photoshop Tutorial Video

Jan 08, 2024
13 Photo Manipulation Tips in Photoshop Video
13 Photo Manipulation Tips in Photoshop: 1. Understand Basic..
Comments Off on 13 Photo Manipulation Tips in Photoshop Video

Jan 08, 2024
How to Create a Typography using Masking Effect
How to create a Typography using Masking Effect: How to crea..
Comments Off on How to Create a Typography using Masking Effect